Hybrid Transitions: A Modern Take on Katazome by Tyler Peterson
October 30, 2016
This moment is an exciting time to be working in the field of fibers and textiles. More so than any other time in history makers, craftspeople, and artists are able to access information about a multitude of different techniques, processes, and materials. Classes, books, and YouTube tutorials are readily available to learn how to make almost anything we set our minds to. Finding ways to recreate traditional processes and use them in my contemporary artistic practice is something that drives my research and informs my work.
Katazome, a traditional Japanese textile process, utilizes a resist paste made from rice flour that is passed through stencils onto fabric. The paste resists dyes and once removed after dyeing the patterns and imagery from the stencil are revealed. I have been working with the traditional process of katazome for several years now and through researching the traditional methods I have been mostly self-taught. Through numerous attempts trial and error I have been finding alternative materials and ways to use katazome in my artistic endeavors.
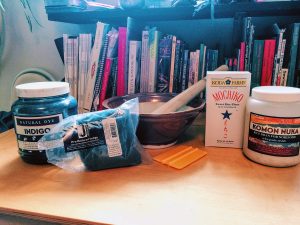
Materials and tools for katazome: natural indigo, pre-reduced indigo, suribachi, squeegee, rice flour, rice bran
The basic materials for katazome paste are fairly easy to find; rice flour, rice bran, calcium hydroxide (pickling lime), and indigo. The harder material to source is the katagami paper used in the stencil making process. Katagami paper is made from several layers of washi paper lacquered together using fermented persimmon juice to waterproof and strengthen the paper. This highly specialized material is becoming increasingly rarer and difficult to acquire. To work around that scarcity I have been exploring several alternatives the most successful being screen-printing and laser cut mylar.
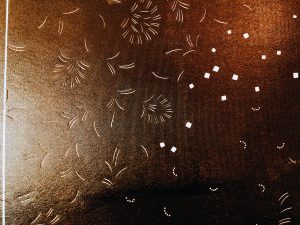
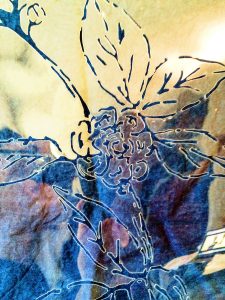
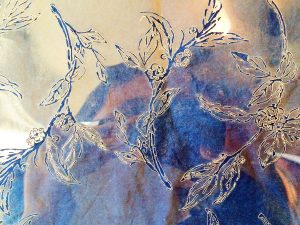
Traditional Katagami stencil
Traditional Katagami stencil
Both of these contemporary replacements have their pros and cons. Screen-printing and laser cut mylar require a larger space and access to modern technology, more so than the traditional practice of cutting katagami by hand. Screen-printing is more simplified than laser cutting and can be done fairly easily at home. The use of the screens and photo emulsion means that the patterns can be quite detailed and include areas where imagery is “floating” in large open areas without support or “bridges”, something not easily done normally. The downside is unlike stencils with their fully cut-open surfaces, the resist paste must pass through a screen. This means that the paste must be passed through more times to lay down a thicker layer to ensure a better resisting of the dye.
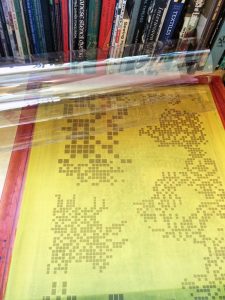
Mylar and silk screen
On the other hand laser cutting mylar into stencils is much closer to the traditional katagami stencils, albeit with a more technological twist. Hand cutting the stencils takes many hours of hard and precise work. Alternatively once your image is properly formatted into a vector drawing, I use Adobe Illustrator, it is a simple thing to send it to a business or friend that has a laser cutter. This can sometimes get expensive and there is definitely a bit of a learning curve to format the image correctly. But once done,it is a relatively easy and fast way to get large and detailed stencils made.
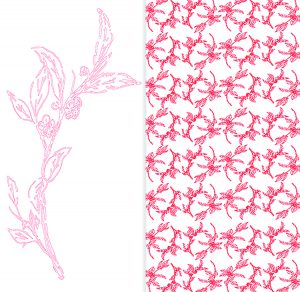
Vectored imagery
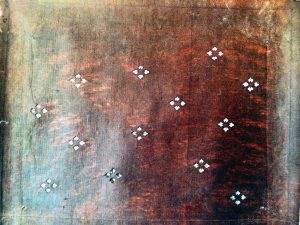
Laser cut Mylar stencils
Laser cut Mylar stencils
I was recently commissioned to make several katazome wall hangings in the seating area of a tea shop. For this project I had several mylar stencils laser cut with imagery that I had hand drawn before formatting in Illustrator. Another “hack” that I used for this project was to use a pre-reduced indigo dyebath. Now “dye-hard” natural dyers may shudder at the use of pre-reduced indigo over a natural indigo dye bath, but I have used both natural and pre-reduced indigo with katazome before and have gotten very similar results. My favorite to use is an ancient recipe that simply uses natural indigo, calcium hydroxide, and ferrous sulfate. It requires many dips to achieve the gorgeous deep blue I desire, but it packs a punch of color! Alternatively, I have found that in situations like commissions or in teaching workshops where time is of the essence a strong vat of pre-reduced indigo can create deep blue fabric that is just as intense in just as few as 4-5 dips.
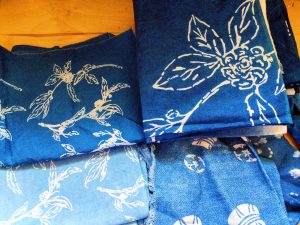
Collection of indigo dyed fabric
One thing I value about the ever increasing prevalence of technology is that information about traditional craft techniques is becoming easier to access and learn about. Additionally new materials and ways of working are becoming available, which creates exciting opportunities for craft practitioners to forge new ways of working with traditional processes while still honoring those traditions. For me it has been a way to celebrate my Japanese heritage and explore what it means to create fiber and textile based work in the 21st century.
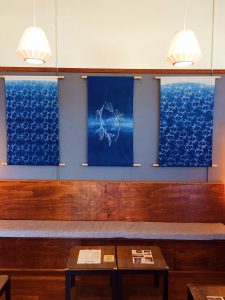
Wall hangings installed in the seating area of The Jasmine Pearl Tea Co.

Resources for learning Katazome
Additional resources on katazome:
- Japanese Stencil Dyeing: Paste-Resist Techniques by Eisha Nakano and Barbara B. Stephan has very detailed instructions for katazome process
- Maiwa Handprints has all the supplies you need
- Traditional Japanese Stencil Designs by Ed. Clarence Hornung is a sourcebook of traditional katagami stencil designs
- John Marshall– American katazome practioner and source for materials
 Tyler Peterson is an artist and educator based in Portland, OR. He graduated with his MFA in Applied Craft + Design and was awarded the program’s 2015-2016 Fellowship position. He has shown work in Oregon, Colorado, and Tennessee and recently finished a residency with c3:initiative and Pulp & Deckle. Since 2014 he has been an instructor for WildCraft Studio School teaching classes on natural dyes and traditional Japanese textile processes.

4 Comments
Sidney says
May 21, 2018 at 7:37 am
Curious what weight of Mylar you use?
Linda says
June 5, 2019 at 2:39 pm
Hello Tyler You mentioned you have a hard time obtaining traditional Japanese stencil paper. I usually always have some in stock, both the traditonal and the newer style with the mylar core. I am located near Bellingham WA so shipping to you would probably be next day. If you ever have questions, please do not hesitate to get in touch. Linda / Washi Arts
Lauren Sinner says
June 15, 2019 at 9:04 am
Thank you, Linda! I forwarded your comment onto Tyler.
Shawn Knuckles says
November 13, 2019 at 12:28 pm
We use (n for middle school students) Yupo paper from Dick Blick 74 lbs for detail work and there is a heavy 144lbs paper too ...all about $5.00 a sheet (26X 40) .
Related Blog Articles
Creative Process
“Fringe: On the Edge of Fiber” — Out Now!
Creative Process
Friday Fibers Roundup: Craft & Color
Creative Process
“Standing Tall: A Heart-FELT Reflection” by Martien van Zuilen